5.11.12

Coconut Milk Rice Pudding


there's something about warm, creamy rice pudding that just so.....sigh....delicious. it's immediate comfort in a bowl. in a cup. in a jar. ummmm....off a spoon right out of the pan (not that i would ever do that, of course). it's the perfect dessert, the perfect breakfast, the perfect afternoon snack. if you have left over cooked rice you have the perfect reason to put this together. it requires few ingredients and only about an hour of somewhat watchful time.


here's what you need:

3 cups cooked rice (my favorite is short grain brown but you could use whatever you have on hand)
1 can coconut cream (14 oz)
1 can coconut milk (14 oz) full fat or light
1/4 cup to 1/2 cup raw sugar (regular sugar can be used. probably brown also though i haven't tried it)
1/8 - 1/4 tsp sea salt (to taste)
1/2 tsp pumpkin pie spice
1 vanilla bean, split
1/4 tsp cinnamon


if you don't have left over rice, just cook your rice of choice per instructions. this is usually one part rice to two parts water brown rice takes longer to cook than white but i prefer it; fuller bodied, nuttier, and better for you. this is the time to add the salt listed in the recipe. if you're using left over rice you can add the salt when adding the spices. you could also leave the salt out completely but it does enhance the flavor if you use it. start with the smallest amount - you can always add more.


to the cooked rice add the coconut cream, coconut milk, sugar, vanilla bean and spices. bring everything to a boil and then reduce the heat to a simmer. you want to let everything cook until the liquid is almost completely absorbed by the rice. this will take about 45 minutes. be sure to give it a stir every now and then.


it's done when it looks like this. your kitchen will smell amazing and holiday-ish. the rice pudding will be crazy creamy and you'll be ready for a bowl. eat it as is or add rasins, dried apricots or dried cherries. toasted, slivered almonds give a nice crunch.  and....not only is this the perfect dessert for those in your home who may be lactose intolerant, you'll also get the added benefits of coconut. yeah you!

enjoy!


29.10.12

Fall Pear Cordial


i wish i could say that fall has hit the west coast. occasionally we get a chilly, cloud filled day - my favorite -  and i break out my knitting, a giant cup of milky earl gray (heavily sugared, naturally) and make sure there's something cozy for dinner. but then the next day dawns clear and hot and i find myself putting away my favorite sweater and dreaming of things like deep dish casseroles, creamy soups, hot fruit crisps and warm bread dripping in butter. temps in the 80's aren't conducive to homey comfort food though so i recently found myself  looking for something cool to drink that tasted like fall. what better than a pear cordial?

this past summer, our favorite cold drink was a bombay saphire and tonic with lots and lots of limes. i make a good one. strong but easy to drink. ummm...maybe that's not so good. anyway, now that it's fall i was wanting something different and a bit unusual. i love pears and i love vanilla and i found a recipe on pinterest (note: what do you think about a pinterest bucket list? cool, right?), went out and bought the ingredients and gave it a go.

here's what i used:

1 vanilla bean, split length-wise
1 strip lemon peel
vodka
4 bosc pears
sugar
water


once again, i'm a walking advertisement for traders. what can i say? i went there for the vanilla beans and the vodka. you can buy the good stuff if you want but it really isn't necessary; with the flavor and sweetness of the cordial, i doubt anyone would notice. i bought the least expensive bottle which was $5.99.


bosc pears. yum. i love their sanding sugar texture and deep flavor. so perfect for this. wash them well, peel and core them and slice them up.


get into your mason jar stash. fill a clean jar with a vanilla bean, a fat slice of lemon peel and enough pears to reach the top. fill with vodka (you could also use brandy), screw on the lid and give it a good shake. store in a dark place for 1 week to 3 months, shaking periodically.  i lasted two weeks . if you make this near halloween, like me, buy some gorgeous pumpkins (got mine from traders. where else?) and use them as photo props for the caterpillar that your child brings home from school while you're waiting for your cordial to develop.

  
when you can't wait any longer, make a simple syrup from 1 cup of sugar and 1 cup of water. add a sliced pear to the mixture. it will add even more pear flavor to your cordial. let it cool. 

pour the vodka mixture into a large bowl and use a potato masher to smash up the pears. remove the lemon peel and vanilla bean and strain the mixture into a clean container. i used a nut milk bag to strain but you could use cheesecloth or a coffee filter. 

add as much or as little of the simple syrup as you like. mix well and pour into a pretty little bottle or back into mason jars.

this is really delicious and a perfect fall aperitif served over ice on a warm evening. or neat on a chilly night. tastes even more delicious served in sweet little glasses or go rustic and serve it out of small mason jars. a sprig of fresh rosemary or sage with a curl of lemon peel would be a great garnish. aaaannnnndddd...i'm envisioning a pear tiramisu with the lady fingers soaked in this liquid gold.

right?!?


22.10.12

Lemony Yogurt Caper Dressing

nothing against the various and sundry "what i wore wednesday" posts i see floating around on a weekly basis, it's just that i can't really relate; a fashionista i am not. love love love all the cute outfits these clever ladies put together but i'd rather be surrounded by grocery bags than shopping bags and i usually am. i'm a foodie through and through. i love talking food, buying food, eating food, sharing food, cooking food, reading about food ad infinitum so, it seemed only fitting for me to incorporate this into my blog.

introducing Made by Me Monday! a weekly place to share and write about one of my deepest loves.


i'm kick starting this new endeavor with a little something to wake up your palette. it's quick, easy to put together and wonderfully versatile ~ lemony yogurt and caper dressing. plus, everyone you share it with will want to know where you got it and when you coyly mention that you made it they'll think you're a genius, which, of course, you are and they'll immediately want the recipe and if you give them the recipe, they'll feel warm and fuzzy inside (think...if you give a moose a muffin).


ok. i didn't actually mean for this picture to look like a shameless plug for trader joe's but wow it totally does, right? what can i say? it's one of the stores i shop at on a regular basis. clearly.

so here's what you'll need:

6 tbsp greek yogurt (i used full fat)
6 tbsp capers (no need to rinse)
6 tbsp extra virgin olive oil
zest of one lemon
juice of one lemon
1 clove garlic (1/2 if it's a large clove)
salt and pepper to taste


throw everything into your blender and whirl away. you can adjust the consistency by adding more yogurt to thicken or more lemon juice to thin down. just give a thought to how you want to use it.


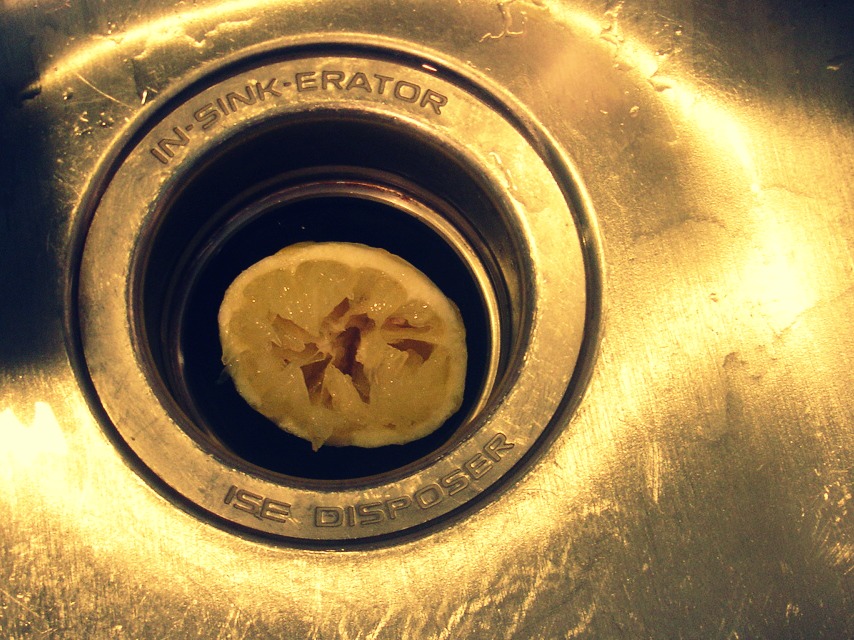
and don't throw away those lemon halves. toss them into your garbage disposal and grind away, lovey.


mmmmm.......can't begin to tell you how yummy this is. don't just put it on your salad either. it's great on chicken, burgers, fish tacos, as a dip for bread or crackers.

you get the idea. just make it already. you can thank me later.


25.9.12

Salted Chocolate Cinnamon Shortbread


if i had to name my favorite cookie it would have to be ~ hands down ~ shortbread. it's easy to make, is the perfect texture, can be flavored with anything and is loaded down with butter; i mean....hellllohhhh!!! and lately, i've been wanting to sink my teeth in to one of these gorgeous little morsels and i was really wanting the flavors of chocolate and cinnamon on my tongue, so.... i prowled around on pinterest for recipes and came up with a basic recipe that worked out well. one thing to note, flour to butter ratio for shortbread is 1:1. too much butter and your cookies will spread like crazy which isn't necessarily a bad thing, just not a shortbread thing. so if, like me, you decide to experiment with adding more butter than needed, don't be disappointed - the resulting crispy, buttery wafers are perfect for ice cream sandwiches and everyone who eats them will think you're a genius! it's true.

Salted Chocolate Cinnamon Shortbread
loosely adapted from ovenhaven of epicurean escapism

2 cups unbleached flour (plus more for your work surface)
1⁄2 cup raw cocoa powder
3/4 cup raw cane sugar
2 sticks salted butter, at room temperature
1⁄2 tsp coarse ground pink salt
1 tsp ground cinnamon
zest from one medium-sized orange
raw turbinado sugar and coarse ground pink salt for sprinkling
  1. Preheat oven to 300°
  2. Cream together butter, sugar, salt, cinnamon and orange zest.
  3. Add the flour and cocoa powder on low speed until combined and the dough holds together.
  4. Put the dough onto a lightly floured work surface, form it into a ball, and slightly flatten.
  5. Coat both sides of the dough with flour and roll it out to about 1⁄2-inch thickness. Cut the dough into desired shapes. Generously sprinkle the surface with raw sugar and coarse salt.
  6. Bake for 30 minutes. Cool on a wire rack. 


and, oh my goodness, eat a couple of these babies before everyone else gets to them. salty, sweet and just the right amount of chocolatey deliciousness. plus...your house will smell amazing when they're baking!


17.9.12

Burlap Wall Art


it's so cool when you score something for free and with just a few flicks of the wrist, or.....ummmm....your handy dandy staple gun and a coupon for Joanne's ~ you're able to transform it into something new. covering a canvas with fabric isn't anything new and most of us have seen some variation of this on line over the last year, but this is the first time i've tried it and i'm completely loving it!

a good friend of my recently moved and kindly gifted me with a giant canvas that she had prettied up but was no longer going to be using.


i took it home and looked at it for a few days and finally decided on covering it with some kind of fabric so i headed over to joanne's thinking that some sort of upholstery fabric would work and there were several that i liked but none that i loved. so, just before i settled, i wandered the isles and found some burlap that i knew would be perfect! plus ~ it was on sale! got 1 1/2 yards for $11.99!


isn't it cool?!? they also had some that was printed with black skeleton keys that almost came home with me and while i've tried my hand at printing on burlap before, there was no way i was going to tackle this bad boy on my own ~ baby's got BACK! 


if you ever do cover something with burlap, be sure to fold your raw edge(s) under before you attach it otherwise, you may get some fraying. 


i'm really happy with the way it turned out. AND....it covers up the electrical box on our wall!!! Yeah!!!


1.5.12

It's Time For A Giveaway!!!


YEAH!!! I'm super excited to announce my very first giveaway!!! I've been wanting to do one for the last couple of weeks thinking it would be a great way to introduce my new shop, meet new people and....well, because I thought it would just be FUN! 

This giveaway is to celebrate receiving 100 likes on my Facebook page and I really hope you'll enter ~ you have five opportunities to do so ~ because there are lots of pretties in the shop to choose from!

Good Luck!


28.4.12

Sugar Baby


My best friends little sister, Rachel, is soon to be a new mommy. This is a bit amazing to me given the fact that I can still remember when she wasn't old enough to completely pronounce my name. Tomorrow, her family and friends will shower her with gifts for the little mer-girl swimming around in her belly and I wanted to make  something special for her little sugar baby and since there isn't much cuter than seeing a little one with eyes closed and rosebud mouth moving in dreamy suckles wearing a knitted hat with a big fat flower on the side...I just couldn't resist!

I found a simple pattern on ravelry which is a must if you knit or crochet and purchased it (note: they have a ton of free patterns too) then took a trip to my favorite yarn shop to pick out something yummy and came away with an organic cotton and wool blend from Classic Elite.

While this little hat can be knit on straight needles, the pattern is mainly written to knit it in the round on double pointed needles (dpn's) which is what I chose to do; no seam to deal with.


If you've put off knitting with dpn's because it seems a bit scary, I totally understand. I felt the same way at first but it really is super easy. The trickiest part for me has always been joining the yarn together after casting on but this time I found a great tutorial on the purl bee (love love love this site!) that made it really clear.


My friend, Angela, is great at crocheting and she kindly made up the flower for me and I love how the color  just pops off the dark pink.


And, of course, it's all in the packaging so I needed to wrap it up sweetly.


I'm really looking forward to giving Rachel this gift tomorrow and helping her welcome her new little girl. Plus, I love baby showers....and bridal showers and weddings and birthdays.

Joyous!


23.4.12

Match Box Notes


I popped into one of my favorite little shops over the weekend and got inspired while browsing. They were selling a sweet little note paper holder made of an aged metal, nice and heavy, and it kind of looked like a box which was open at each end and filled with thick paper to pull out a piece at a time for jotting down little notes by the phone or on a desk. Super cute and I really liked how the pages were individual pieces and not stuck together like a post-it pad.

I was sure I could come up with some kind of knock-off so when I got home I started thinking about what I could use for the open ended box part of it since I was definitely lacking in the metal department. Rummage, rummage, rummage....hello old match box!


If you have one of these laying around go ahead and get it for this little project (there weren't too many matches left in this box anyway and you know how us craftees are...) or grab the box from the moisturizer you just bought or raid your pantry for a box.


I cut my box in half though depending on what you have on hand, you may not have to cut at all or cut just a small portion. It would just depend on how big you want your holder to be.


Now...choose some awesome paper to cover your box. I got out my much loved much used dictionary and took a few pages to use. Measure your box and cut your paper to size.


I used Mod Podge and covered both the inside and outside of my box and overlapped the paper a bit to cover all the edges. Be sure to let it dry before you put the paper in. (i know this last bit seems like a no-brainer but if you're anything like me...)


I made sure the little picture was on the top buuuuut....then I covered it up with hemp twine and canvas and linen roses. Go figure. I like it either way; just depends on your preference. It's filled with individual pieces of cream colored cover stock. Nice and thick and not completely even which I like.


It's a great way to upcycle items that you probably already have on hand. Plus...it's refillable so you can have it around for a bit and if you make one for someone, they won't have to throw it out once the paper is used up. Not that they would...


Related Posts with Thumbnails