Showing posts with label upcycle. Show all posts

23.4.12

Match Box Notes


I popped into one of my favorite little shops over the weekend and got inspired while browsing. They were selling a sweet little note paper holder made of an aged metal, nice and heavy, and it kind of looked like a box which was open at each end and filled with thick paper to pull out a piece at a time for jotting down little notes by the phone or on a desk. Super cute and I really liked how the pages were individual pieces and not stuck together like a post-it pad.

I was sure I could come up with some kind of knock-off so when I got home I started thinking about what I could use for the open ended box part of it since I was definitely lacking in the metal department. Rummage, rummage, rummage....hello old match box!
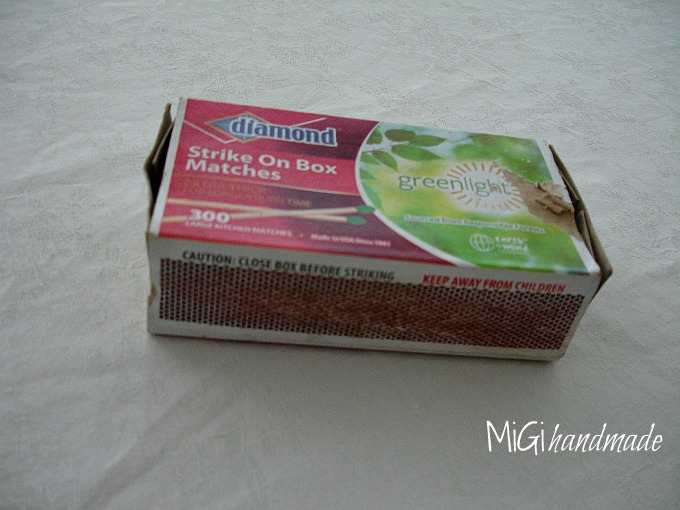

If you have one of these laying around go ahead and get it for this little project (there weren't too many matches left in this box anyway and you know how us craftees are...) or grab the box from the moisturizer you just bought or raid your pantry for a box.


I cut my box in half though depending on what you have on hand, you may not have to cut at all or cut just a small portion. It would just depend on how big you want your holder to be.


Now...choose some awesome paper to cover your box. I got out my much loved much used dictionary and took a few pages to use. Measure your box and cut your paper to size.


I used Mod Podge and covered both the inside and outside of my box and overlapped the paper a bit to cover all the edges. Be sure to let it dry before you put the paper in. (i know this last bit seems like a no-brainer but if you're anything like me...)


I made sure the little picture was on the top buuuuut....then I covered it up with hemp twine and canvas and linen roses. Go figure. I like it either way; just depends on your preference. It's filled with individual pieces of cream colored cover stock. Nice and thick and not completely even which I like.


It's a great way to upcycle items that you probably already have on hand. Plus...it's refillable so you can have it around for a bit and if you make one for someone, they won't have to throw it out once the paper is used up. Not that they would...


25.1.12

Drop Cloth Valentines


I've got two chairs in my living room that I really love and that desperately need to be reupholstered and as I don't know the first thing about upholstery and being that I don't have the dollars for the high price of having it done professionally, I got the bright idea to make up some slip covers for them using painters drop cloths. There are tutorials out there for the process, and you don't need to be an incredible sewer to make one; you do, however, need to possess the patience of Job! After much pinning and trimming, cutting and ripping, fitting and refitting; mine ended up in the trash, sent off in irritated silence. I was only happy that I hadn't spent lots of money on some gorgeous material for the job.

Needless to say, I still had about 3/4 of a yard of the drop cloth left over which I've held onto for crafting of some sort and it really came in handy for these little Valentines Day conversation hearts. Wanna make some? Here's what you'll need:


scrap fabric
paints (doesn't need to be specifically for fabric; I used acrylic)
stamps
dried lavender
essential oil (I used sweet orange)
embroidery floss
heart cookie cutter or other template
small funnel or demitasse spoon


Aren't they cute? And they smell wonderful! I mixed several drops of sweet orange essential oil into the lavender before I spooned it into the hearts. Be sure to pack it in pretty tight before you stitch the heart closed. I put one in my purse to keep it smelling sweet and they'd be a perfect little gift for your special valentine! Or....you could get crazy and make something a little bigger like the ones I made below also using up my left over drop cloth.


Get crazy girl....homemade valentines are the best!


Pin It


14.9.11

Upcycled Grocery Bag

This past August, the city we live in stopped allowing stores to use plastic grocery bags effectively forcing it's inhabitants to go green whenever they shop and while most of these stores sell reusable bags to hold your purchases it's a quick process to make several of your own to use instead.

A couple of days ago I was sitting at my computer, pinning my little heart out, (oh how I love Pinterest...) when I came across this great tutorial from Between The Lines for a grocery bag made out of an old t-shirt.


We have LOTS of old t-shirts at our house so I rummaged around and found one to use. The fabric of this particular shirt is on the thin side and I think a thicker one would definitely produce a stronger bag for things like produce and eggs and such. Mine would be fine for bread, lettuce, paper towels...things that are on the lighter side.

The directions are pretty straight forward and there's even tutorial links for French and box seams if you're not sure how to do one or both (like me).


I also really like that slits are cut vertically which was SO much easier to do than making horizontal cuts like some others I've seen.


To reinforce the handles a bit I added some ruffles using a few strips of unbleached muslin I had on hand.


Kind of looks like a tank top. Actually, without closing up the bottom it would be cute to wear over a swim suit. Go rummaging through your drawer and pull out some of those t-shirts you don't wear anymore but have been holding on to for some reason. Save one or two for fabric flowers and then transform the others into grocery bags to keep in the car with you. If your city stops using plastic grocery bags, you'll be ready!

Pin It


Related Posts with Thumbnails