30.12.13

Handmade Rice and Lavender Warmers


one of the absolute best things that i bought for myself when i was pregnant with our youngest was one of those heating pads that are filled with rice. you know, the kind that get heated in the microwave and provide a good hour's worth of gentle warmth. used it all the time and loved it! loved it so much, in fact, that it's been my go too "warmie" ever since. sadly, friends, said warmie has since soothed it's last tired muscle and had to be retired. not to worry though. making a replacement was easy and inexpensive and, as it turned out, the perfect last minute christmas gift this year.

i wanted mine to have covers that could be thrown in the wash if need be so i picked up a canvas painters drop cloth to make them because i love its "shabby" look and the light, solid color is perfect for personalizing. the materials don't cost much (well, they don't have to) and you probably have some of them lying around the house already. technically, all you need is rice and fabric but if you want to glam them up a bit, like i wanted to, you can get crazy. and, by the way, don't be daunted by the amount of things i used. you can certainly do less and it will still be fabulous!

the what
canvas painters drop cloth (the smallest size available - you'll still have lots left over)
1 yard unbleached muslin - 45" (i was able to make 8 with this amount)
rice (i used brown. the 99¢ store is a perfect resource for this, especially if you're making several)
dried lavender (i already had some on hand and also purchased some from world market)
loose leaf herbal tea
lavender essential oil
jasmine absolute essential oil
acrylic paint
foam alphabet stamps


start with making the insert that will hold the rice. cut the muslin to the size you want (mine was approximately 14"x9"). using 1/2-inch seam allowance and beginning with a short side, sew a straight seam that starts1/4 of the way up from the bottom right edge and sew around entire piece ending 1/4 of the way down from the top right edge (above your starting point). this will leave an opening. turn it inside out so that your seams are facing inside. press all around, turning in your opening and pressing as well.


after you've pressed your seams, top stitch 1/4-inch in from the edge all the way around, except for the opening. now, this next step probably isn't necessary, but i went around and zig-zag stitched over my top stitched straight seam because i wanted my edges really secure.


now comes the first fun part - filling the insert with the rice. i mixed the essential oils and herbs into my rice a couple of hours before i started because i wanted the smells to really hang out and scent the rice. there's no rhyme or reason to amounts here. just add as little or as much as you like until your satisfied and feel free to experiment with aromas.


i used 4 cups of rice per bag which filled it about half way. be careful not to over pack it. you want it to be flexible enough to mold to your body. sew up the open edge.


now for the covers. be sure to have already washed and dried whichever fabric you're going to use.  for me, this was the canvas. i searched pinterest for ideas and came across two that i liked: this one from V and Co and this one from The Tangled Nest. i went with the latter for the mere fact that i liked the design the best and it just felt more simple. no pictures of the process here so just follow the tutorial or come up with your own design.


i made some of these for our kids and wanted each one to have a personal touch. for me, that meant stamping on their name in their favorite color. you could do this before or after you construct your cover but if you do it after, be sure to insert some kind of cardboard behind the area that you stamp to prevent any paint from leaking through. after they were dry, i covered the name with a scrap piece of muslin and went over it with a dry iron to heat set the paint. i have no idea if this will make a difference when washing it in the future but seamed like the thing to do. heat set ink or fabric paint may have been the better option here.


after that, sit back and admire your handiwork! these smell wonderful and the kids loved having their very own warmie to use whenever they want. to use, just remove the insert from the cover and heat in the microwave for 2-3 minutes depending on your microwave and how hot you want your warmie to be. please be careful when removing and placing the insert as it will be hot.


just a little note. don't feel that you have to purchase new fabric for the insert or cover. old sheets and pillow cases are great alternatives to muslin and i also made two covers from an old quilt and some upholstery fabric that i had on hand. it's a great way to upcycle.

enjoy! and happy new year!!!


11.10.13

Feathery Salt Dough Ornaments


a while back, i wrote a blog post about the most humble of craft mediums - salt dough; that unpretentious little ball of clay formed from salt, flour and water. apparently, people got excited about it because not only has it become my most popular post, it's also the one most pinned. and what with christmas practically in our back yards already, i thought i'd play around with the stuff a bit and use it to make feathers. some pretty snazzy ones at that.


the salt dough ornaments i made previously were done by rubber stamping an inked image onto the dough and then using cookie cutters to get my desired shape. these feathers were made free-form with a knife, a pastry cutter and my imagination. and really, it's the embellishing that makes them come to life. i think several of these would be lovely on a big green tree (nobles are my personal favorite) with lots and lots of white lights and some silver mercury glass ornaments here and there.

i sure hope you give them a try!


13.9.13

Gluten Free Chocolate Shortbread Songbirds


it's not like i started out to eat gluten free; at least not on purpose. it came about because next year, i'm going to start catering meals out of my house once a week and want to focus exclusively on gluten free and vegetarian meals. so... i've been trying out a bunch of new recipes because everything has to be delicious, and i don't want anything to taste like it's lacking in flavor or richness.

one of my favorite things to eat are cookies. love love love them! and shortbread...be still my heart!!! crispy, buttery, rich and just sweet enough. while there are various and sundry recipes out there for gf shortbread cookies, i end up not wanting to tackle the ones that call for 5 different gf flours (too daunting and pricey!). and i've tried a couple of recipes that use almost all brown rice flour which, in my opinion, resulted in a cookie with a cracker-like consistency which i wasn't a fan of.

finally, the heavens parted when i came across a chocolate gf shortbread cookie recipe that i've kind of fallen in love with. perfect texture, subtle sweetness, a delicate crunch and just enough chocolate to satisfy any craving. the dough comes together with minimal effort and no one - i mean no one - would ever know that they were gluten free.

Gluten Fee Chocolate Shortbread Songbirds
adapted from this recipe at G-free Foodie

the what...

½ c unsalted butter, softened
½ c powdered sugar
1 tsp vanilla
¾ c gluten free all purpose flour (i used trader joe's brand)
2 tbsp sweet rice flour
¼ c cocoa powder
¼ c almond meal (i used trader joe's almond meal)
¼ tsp xanthan gum
1/8 tsp salt
¼ c unsweetened cocoa powder


the how...

1. Beat butter and sugar until cream, add vanilla, mix well.

2. Add dry ingredients, stir until a soft dough is formed.

3. Mound dough onto plastic wrap and refrigerate for 30 minutes.

4. Preheat oven 350 degrees. Line cookie sheet(s) with parchment.

5. Sprinkle about 1 tbsp of apgf onto your work surface and roll out dough to 1/4-inch thick. Cut into desired shape(s) and place on lined cookie sheet. Sprinkle with granulated sugar. Chill again until cold before baking (about 10 minutes in the freezer).

6. Bake 9-11 minutes. Cool cookies on cookie sheets for 15 minutes before transferring them to a wire rack to finish cooling completely.


of course, you can cut these into any shape you want...i happen to think the little birds are super sweet but they'd also be a great slice-and-bake cookie when you don't want to deal with your rolling pin. either way, you'll want to eat keep them all to yourself.

love ya!!!


6.9.13

Make Mine Vintage


 on the 3rd sunday of each month there's a great antique flea market i love to go to. starting at 5am, one can walk among aisles and aisles of terrific vintage finds, shabby treasures and retro gems until their head starts to swim . last month i came away with some old children's books, dictionaries and flash cards that i knew still had life in them.


these flash cards were the perfect fit for some blank note cards i already had. and i used this tutorial to put together these little gift bags using pages from a 1957 nursery rhyme book that had the most gorgeous illustrations.


i can't wait to use the cards to send a special note and the bags will definitely be used to wrap up some sweet little gifts. there's just something about vintage items that immediately calms me down and gets me longing for simpler times. i remember books i read as a little girl (something by beverly cleary with a passel of children eating cake from chipped china plates in old box cars), stories passed down by parents and grandparents, classic movies with black and white beauties on the arm of their fellas.

are you a vintage junkie too?


22.7.13

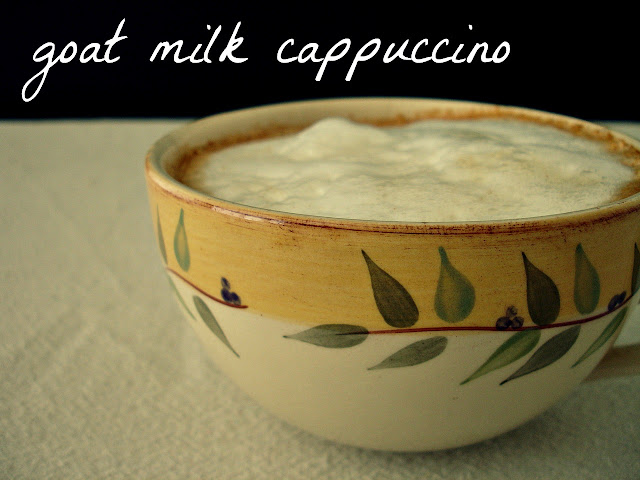
Goat Milk Cappuccino


i go in spurts when it comes to drinking coffee. i might drink a cup each morning for a couple of weeks then switch to tea for a bit. this is because i drink coffee for the taste and not the pick-me-up that most others do and since my tastes change with my mood, well...

lately, i've been delving more and more into goat milk in all it's various guises and am really loving it; goat cream cheese = wow; goat butter = angel song. and lately the milk...yummm. today, i felt like sipping on a cappuccino and because i had some goat milk in the fridge i thought i'd experiment.


a little aside here. a lot of people can't tolerate dairy which isn't a newsflash. when this became more and more apparent many years ago, most popular coffee houses made soy milk available as a replacement to the usual cow's milk and those who were lactose intolerant could still enjoy a blended drink or just a regular cup of coffee. now i'm starting to notice almond, hemp and coconut milk showing up as well which is great for those who have forgone dairy completely or just want to make a healthier choice.

as i mentioned in this post, there are several benefits that come with drinking goat milk, one of which being that it's easier to digest than cow milk and therefore usually tolerated by those who can't handle lactose. so, a cappuccino with goat milk? yes please!


the verdict...pretty good. a bit 'goaty' which does change the flavor of the coffee a bit but, in my experience, soy milk does the same thing due to it's flavor and to some degree, so do the others. it definitely frothed up beautifully though and looked exactly the same as if it were made with cow milk. since i haven't come across any coffee houses that offer goat milk as an alternative, you may be trying this at home for the time being but i hope you do. come back and tell me what you think.


10.7.13

Billy Goat's Gruff And A Biscuit


i'm a sucker for a good biscuit. no. wait. i'm a sucker for gourmet food products annnnnd a good biscuit. in fact, a couple of years ago a good friend of mine took me out for my birthday and do you know where i wanted to go? whole foods. she didn't bat an eye when i said it because she's that kind of good friend; the one who gets me and loves me anyway and knows that leisurely strolling up and down the aisles of whole foods is like balm to my soul. now, if i'd had a plate full of warm biscuits to nibble on while strolling - especially these biscuits - let's just say that that birthday outing would have gone down in the books as the best one EVER!

to me, biscuits don't get baked near enough. most often one makes muffins or scones or bread. biscuits...not so much. and i'm not really sure why; they're quick to throw together, no crazy ingredients are needed and when they're served hot on the table they're pretty much GONE before the end of the meal; quickly grabbed in one hand while the other waits impatiently for the butter, knife poised.


yesterday, i was mucking about on pinterest (no surprise there) and came across a couple of new blogs. the first, authored by bonnie christine, going home to roost, with a wonderfully easy recipe for chia seed jam led me to the next, my new roots, written by sarah britton. it was sarah's post on making yogurt (by yourself and without any special equipment) that got me thinking about goat milk and wondering if there was such a think as goat milk butter.

lo and behold...there is!


a bit of recon and i learned that i could purchase this 8oz block of gorgeousness at whole foods (see what i mean?!?). it's not inexpensive but if your willing to splurge, one-half pound of goat butter will set you back $5 and change. my mom, also an avid baker, happened to be at my house when i came home with my purchase which we immediately tried and immediately fell in love with.


honestly, this butter isn't like any other i've ever tasted. while it's full fat just like regular cow milk butter, there is a distinct lightness to it that's immediately noticeable once it hits your tongue. it's creamy, sweet and subtly  floral without the "goaty" flavor or aftertaste that accompanies goat cheese . the creamy white color might throw you a bit a first but not to worry; goat butter is naturally white because goat milk doesn't contain beta-carotene. and...some benefits of goat milk are that it's less allergenic, naturally homogenized, easier to digest, rarely causes lactose intolerance and matches up to the human body better than cow's milk. wow! i'm thinking i might need to switch things up over here.
all that said, i started looking for recipes that used goat milk butter and found one for biscuits that just used 1/2 cup in the recipe which meant i'd have enough left over for slathering. oh yeah...i slather.


i followed this recipe from the blog, oranges and avocados, and they turned out great. i only had bread flour on hand, however, so mine don't look as flaky and level as hers but i love love love them and they made a scrumptious little lunch.


goat milk butter biscuits

the what
2 cups bread flour
1 tsp baking soda
1/4 tsp himalayan fine pink salt
1/2 cup cold goat milk butter, thinly sliced
3/4 cup whole milk

the how
preheat oven to 400 degrees. stir together dry ingredients. add butter slices to dry ingredients and, using your hands, rub in the butter until pea-sized crumbs form. add the milk and stir just until combined. be sure not to overwork the dough.

turn out onto a lightly floured surface and pat it out to about 2/3" high. use a round cookie cutter to cut biscuits. gather the scraps together, pat out again and cut remaining dough. place biscuits on a lightly greased or parchment-lined cookie sheet. turn down the oven to 375 degrees and bake for 20 minutes. serve immediately with your left over goat milk butter and fresh honey or jam or cheese or ham or top with a poached egg and hollandaise...


when i was working the butter into the flour mixture, i could actually smell this butter and it smelled the way it tastes. divine. i really hope you make these or at the very least, buy some of this butter and put it on your morning toast. you'll want to thank me. you really will.


you're welcome!


30.5.13

Pancake Beauty...Blackberry, Honey, Coconut Syrup


i never really plan to make pancakes. there are just times when i walk into the kitchen, hungry, and know that pancakes are what i want. like today. and the cool thing about them is that pretty much anything can go into the batter and i always have the basic ingredients on hand: flour, eggs, milk... you know the drill. and while boxed mixes are convenient, making your own from scratch results, in my opinion, in a much heartier taste and texture. this morning i threw together brown rice flour, coconut flour, eggs, milk, ground flax, unsweetened applesauce, a bit of salt, some cinnamon and baking soda. honestly though, these were just a vehicle for what i really had in mind to make this morning. blackberry syrup.


in the last couple of weeks, i've started to pay attention to how much sugar i eat each day. a ridiculous amount, really. and even people who eat relatively healthy still take in about 30 teaspoons a day ~ over half a cup. ouch! and just a 1/4 cup of maple syrup has 43 grams of sugar which is a little over 8 teaspoons of sugar per serving! you get the picture. so, that said, i wanted to do something with the fresh blackberries i bought yesterday and some avocado blossom honey i got over the weekend. of course, there's still sugar in honey and there are also some health benefits to it, especially when it's raw. add to that the many health benefits of coconut oil, a bit of cardamom and, lovey, you've got yourself a delightful syrup.


no real recipe here. i used about 2 tablespoons of virgin coconut oil, melted. 1/4 cup of honey, about 1/2 cup fresh blackberries and 1/8 teaspoon cardamom. whirl it around in the blender until it all comes together and gets kind of creamy.


really, really good! sweet, creamy, flavorful. and with summer almost here there are so many fruits that would be terrific to try with this: apricots, peaches, pineapple, strawberries, raspberries, blueberries. go with berries to keep the sugar content down if you're wanting to lower your intake.


Enjoy!


Related Posts with Thumbnails